Sentiments Implementation
As of 30 Sep 2019, agencies are able to activate WOGAA Sentiments for their respective services. This can be activated by following the guided steps on wogaa.sg under Manage Sentiments.
- Enabling Sentiments for your Informational Service (IS)
- Enabling Sentiments for your Transactional Service (TS)
- Enable Sentiments for Multiple Transactional Services
- Testing Sentiments on Non-Prod Environments
Prerequisites
In order to start using Sentiments on your services (e.g. IS and/or TS), you should ensure that you have fulfilled the following prerequisites:
- Informational Service / Transactional Service should be registered on WOGAA
- Informational Service should have completed implementation
- Transactional Service (if any) should have completed implementation
- Login to https://wogaa.sg as the OIC of the Informational Service
Enabling Sentiments on your Informational Service (IS)
Step 1: Navigate to Manage Services
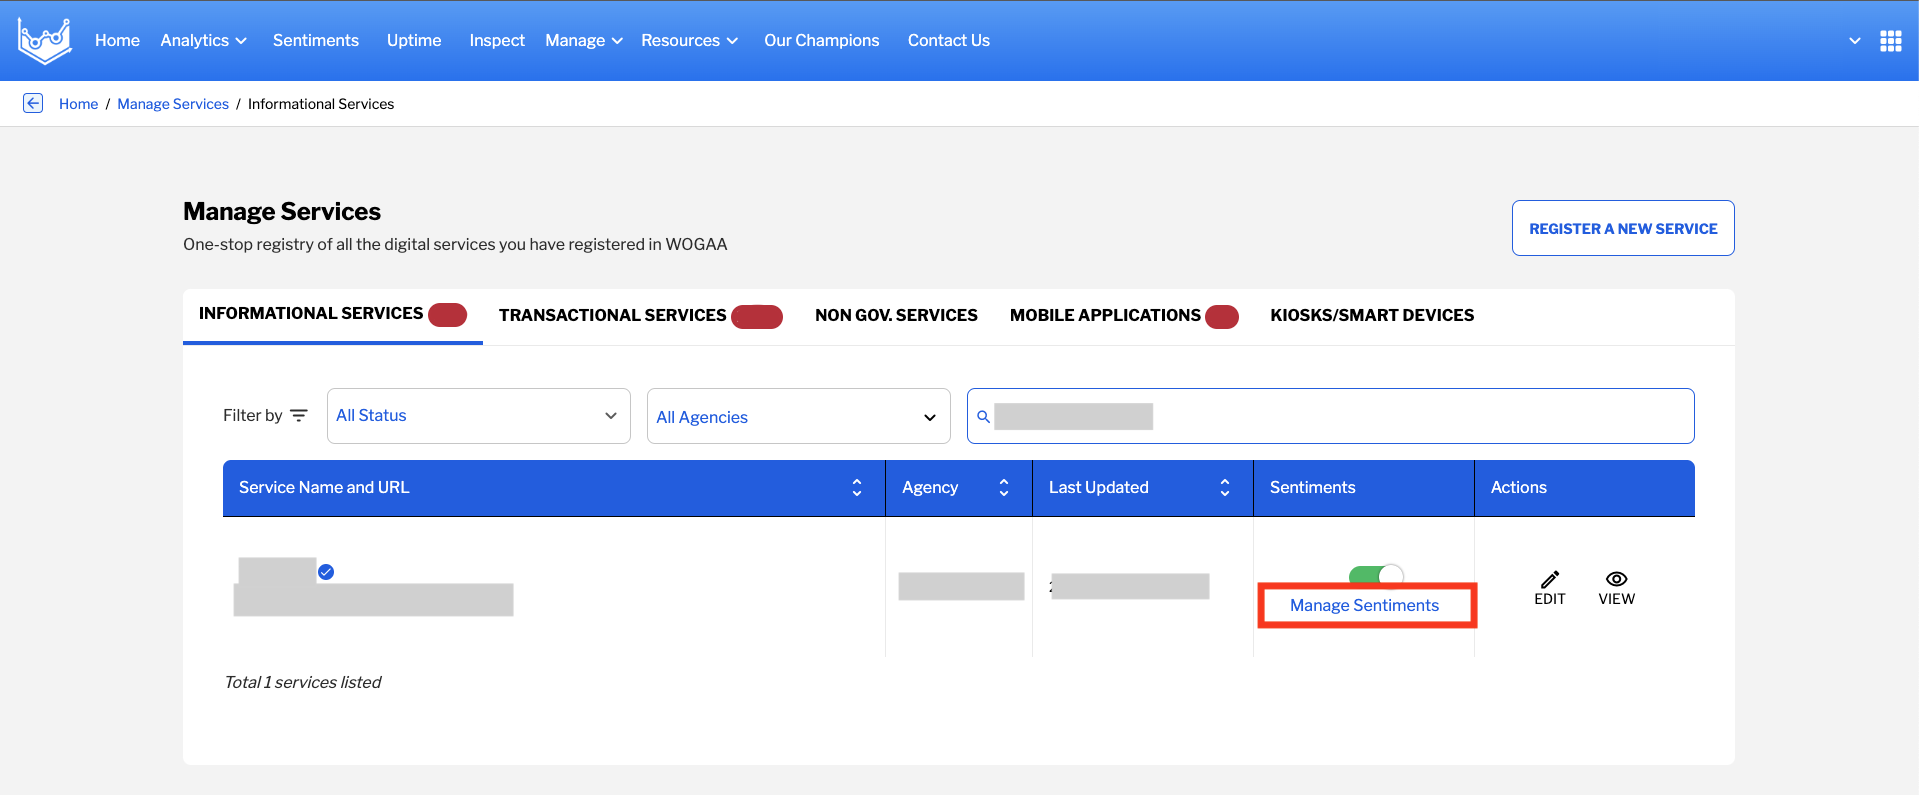
Click on Manage Services

Step 2: Locate Service Name
Enter the Service Name on the search bar or navigate through the list to select the service you want to enable Sentiments for by clicking the toggle button above Manage Sentiments or you may toggle and configure more in Manage Sentiments
Step 3: Toggle Sentiments Status
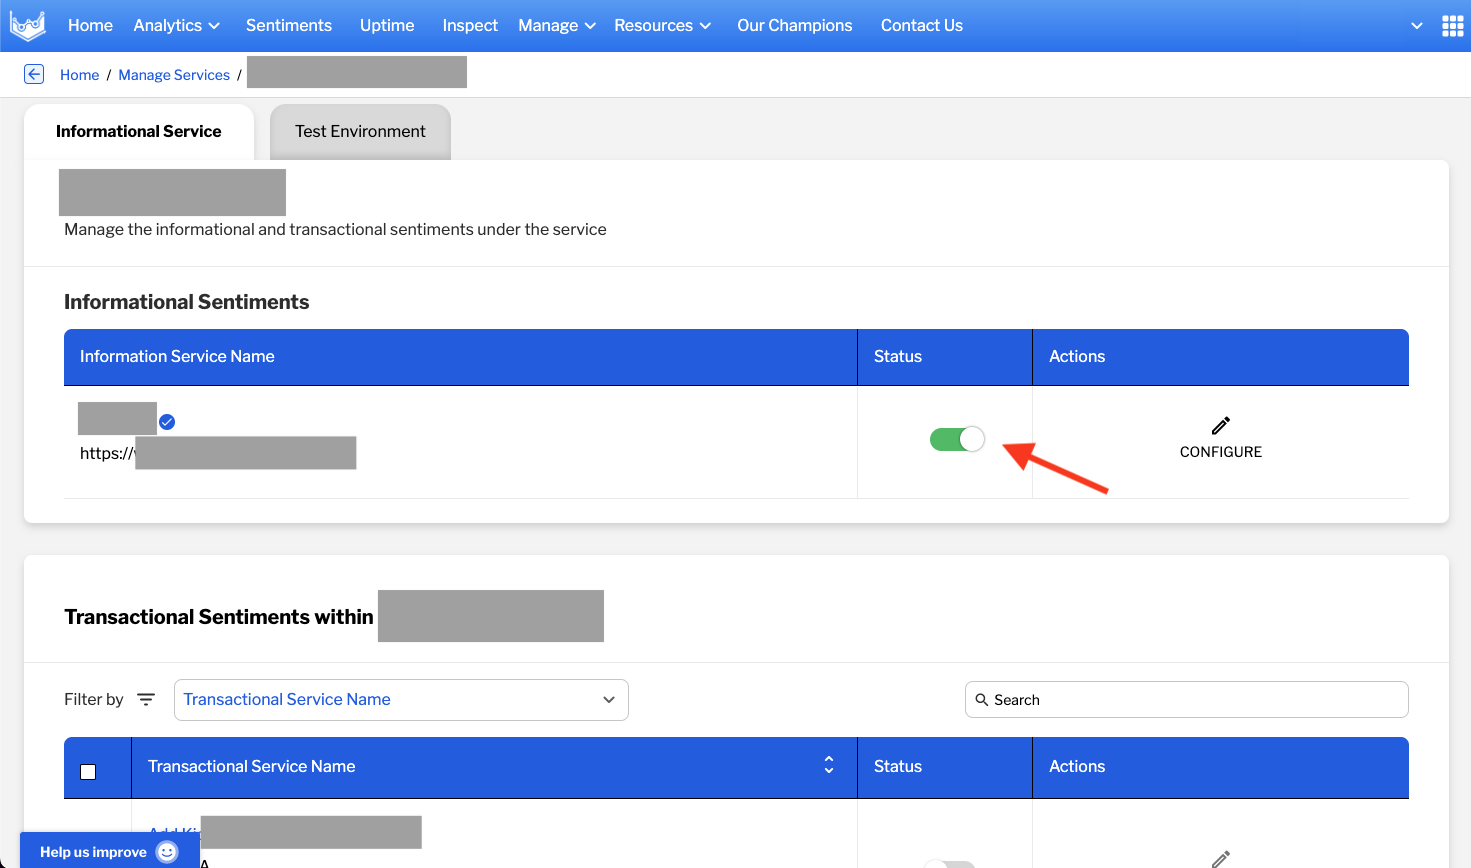
Choose on the services (IS or TS) that you want to enable Sentiments for. Click on the Sentiments Status toggle, it allows you to toggle the Sentiments widget appearing on your site/service on or off. This will immediately halt all data collection from Sentiments the moment you turn it off.
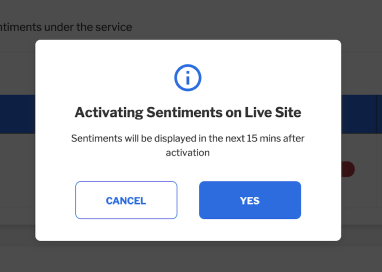
Here you will see a modal dialog pops-up where you can confirm the activation of Sentiments on your Live Site.
Step 4 Confirm activation
Click YES. You should see a success message similar to the one below:

And that’s it! You have successfully activated Sentiments on your Production/Live Service.
Enabling Sentiments on your Transactional Service (TS)
Since Transactional Service(s) are grouped according to their respective IS (es) under Digital Service Register (DSR), it is required for the IS to be verified first before you can start enabling Sentiments on your individual TS(es).
To enable Sentiments on a TS, you first need to select the IS that your TS resides in, under Manage Sentiments, then follow through similar steps as described above for enabling Sentiments on an IS.
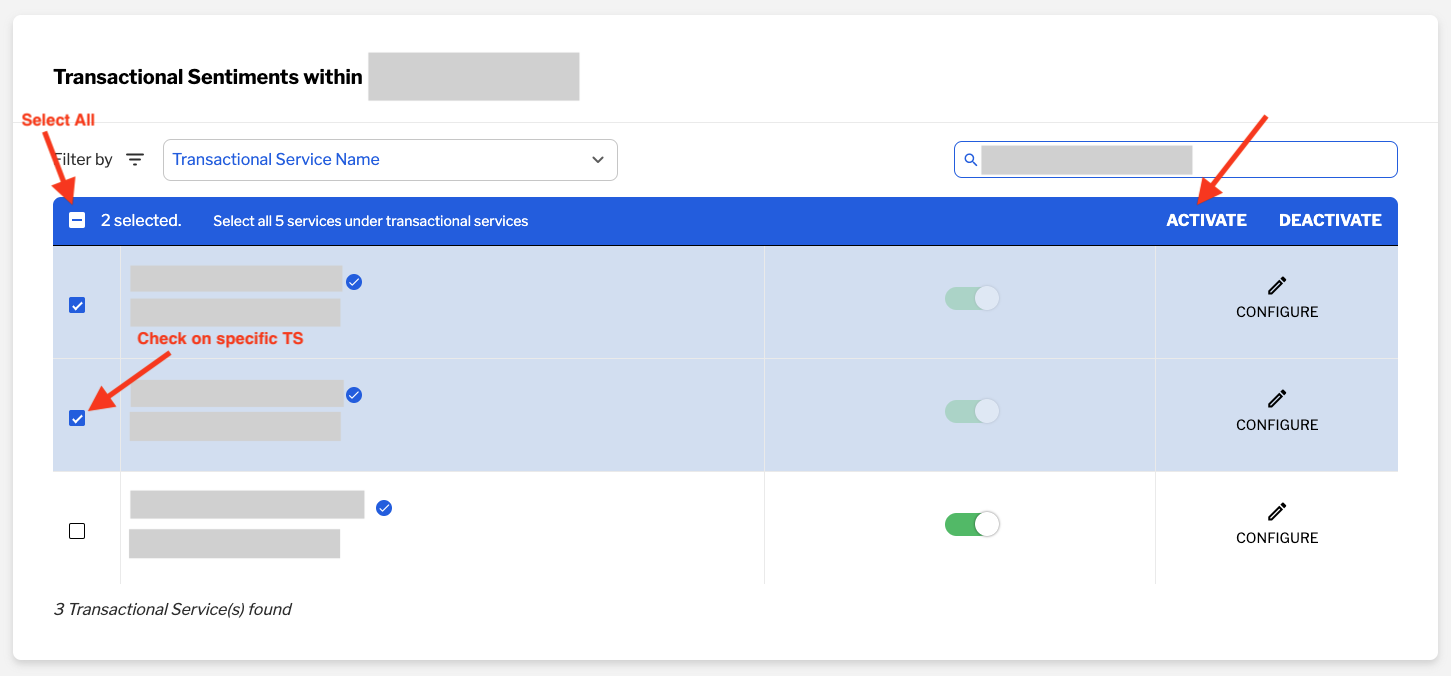
Enable Sentiments for Multiple Transactional Services 
If you need to enable Sentiments for multiples TS(es) at one go, click on the Select All (1) checkbox and then click on ACTIVATE (2). Sentiments will then be successfully enabled for all the selected TS(es).
Testing Sentiments on Non-Prod Environments 
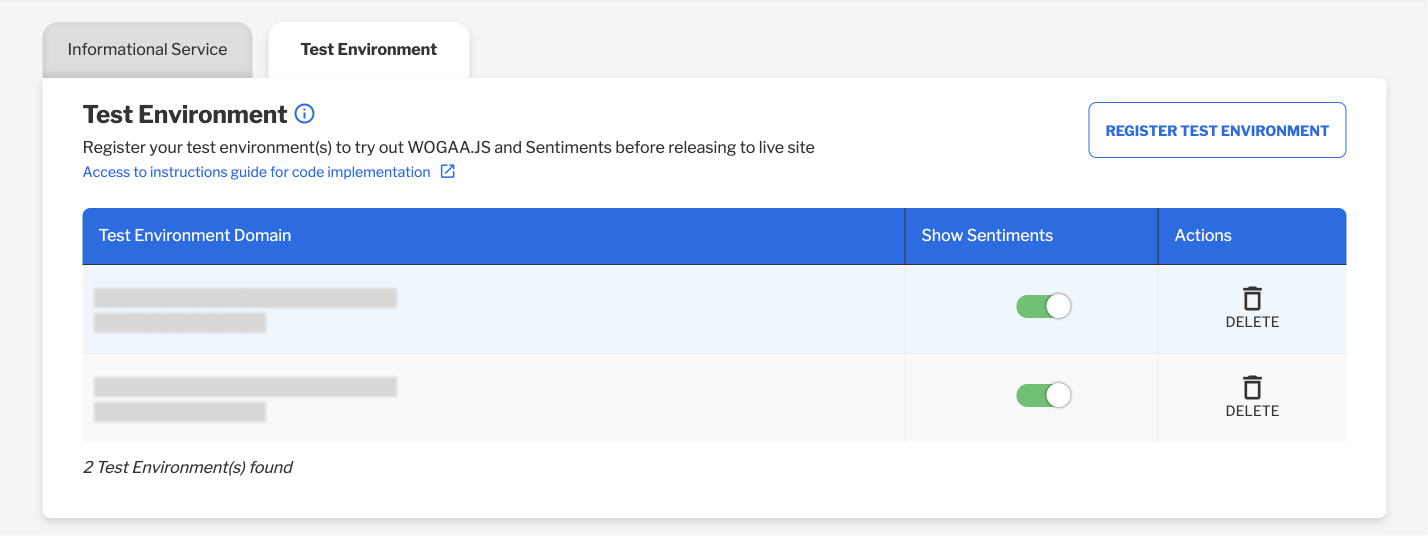
To test out the behaviour and interaction of Sentiments on your Non-Production (e.g. Development, QA, Staging) Environments, you can simply select on the Test Environment Tab and by clicking on the REGISTER TEST ENVIRONMENT and enter your Non-Prod domain name (without the path) into the text field.
For e.g. "http://[dev,stg,qa].example.com"
Note: Make sure your Non-Prod Environment(s) is using the right testing script tag.
